Locator Attachments: Trouble Picking Them Up in Overdenture?

Dr. L. asks:
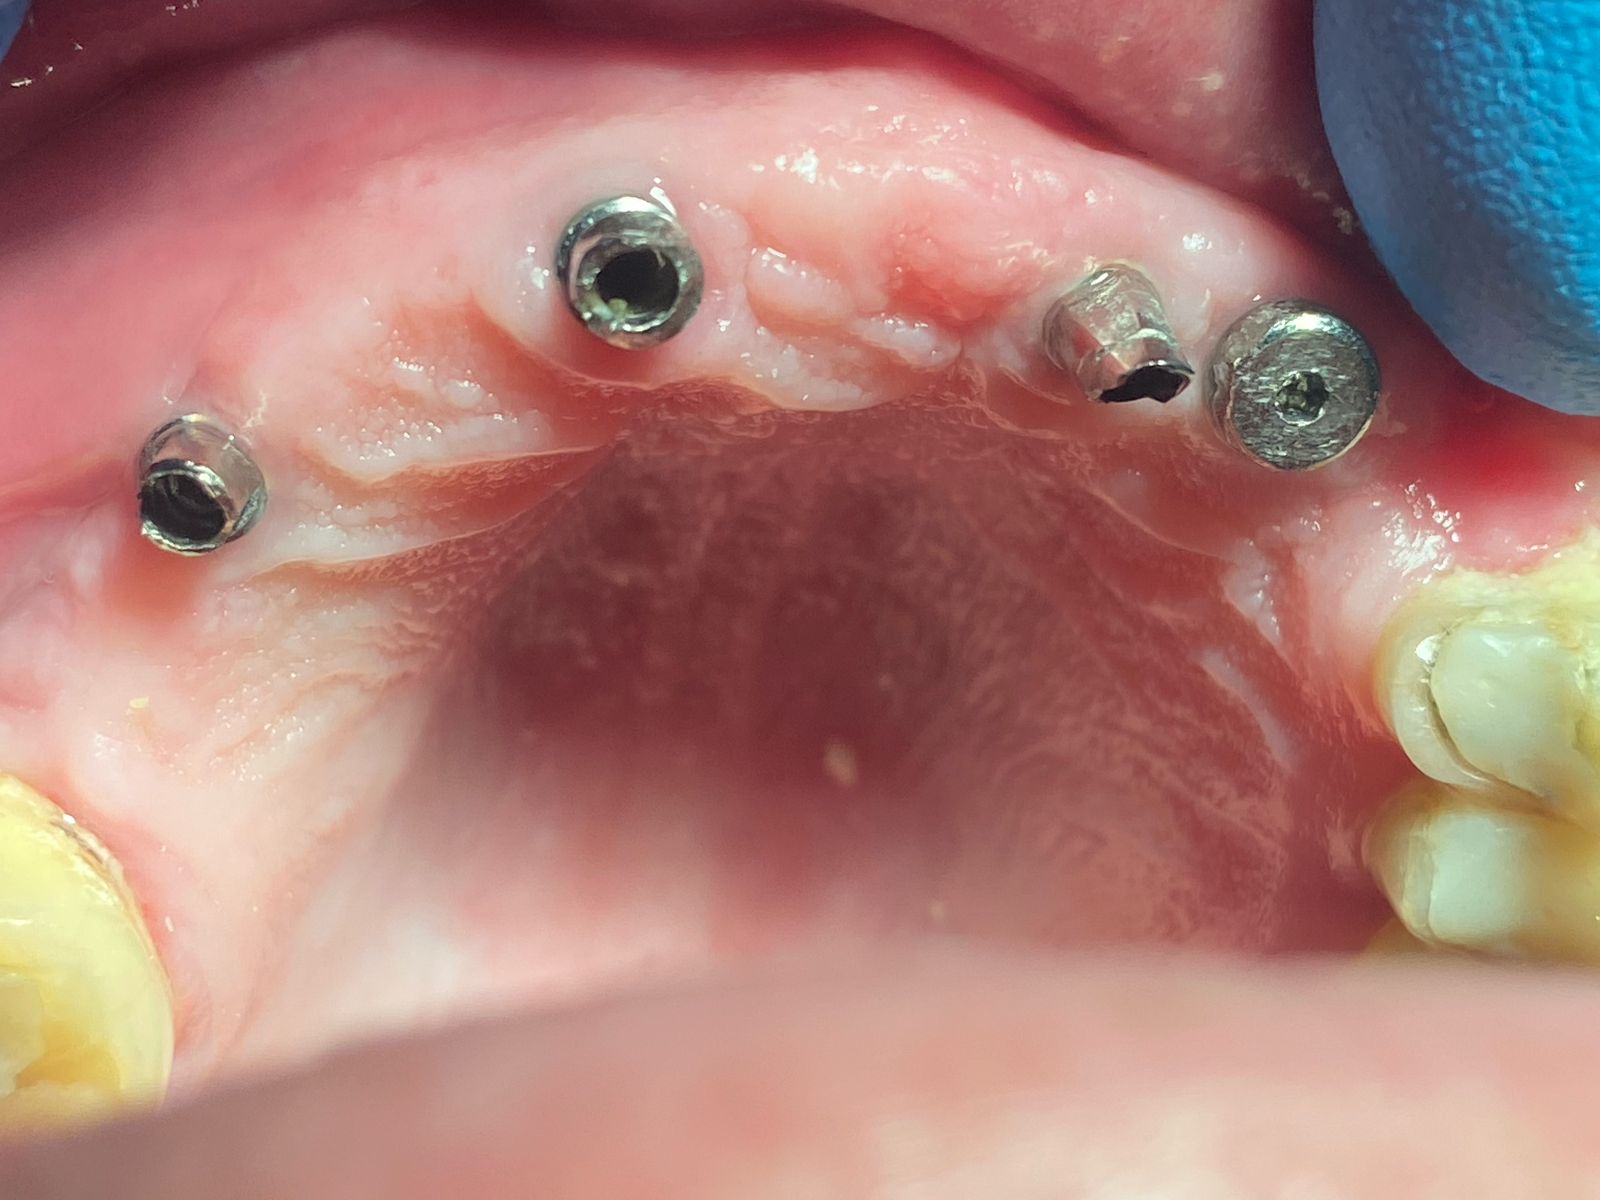
I have just started doing mandibular retained overdentures. My oral surgeon recommended Locator attachments [Sterngold] and these are great. But one problem I have been having is picking them up in the overdenture.

My protocol is to first make a complete lower denture. After the two dental implants are placed in the canine positions, my surgeon hollows out the denture over the implant sites. After the implants heal, he uncovers the implants and places transmucosal healing abutments. I then replace the healing abutments with Locator attachments. The problem I have been having is picking up both Locator housings at the same time. I have nearly locked on the overdenture a few times. I am wondering if it is better to pick up one housing at a time. Will this work? Do I have to pick them both up at the same time? What acrylic are you using for this?

19 Comments on Locator Attachments: Trouble Picking Them Up in Overdenture?

New comments are currently closed for this post.
Scott Mullaly
7/21/2008
Dr. L, Thank you for using Locator attachments made by Zest Anchors. The decision to pick up attachments one at a time or all at once is determined by your comfort level with the procedure. The Locator was designed to be very low, so the chance of locking on is remote. This link should help: Zest Anchors PDF Download Scott
DR.C
7/21/2008
try the red extra light replacement male later you can replace them with the blue ones
Nicholas Varras, CDT
7/22/2008
Dr. L, Sterngold makes a great Pickup material for this sort of thing. It is called ERA pickup. It is a self-curing bis-acryl composite with less than 1% shrinkage for a very accurate pickup of the attachments. It has a higher viscosity than cold-cure acrylic so there is less danger of it flowing into an undercut and locking the attachments in place. The patients also love it because it is odorless, tasteless and stays at a low temperature while curing. Using some rubber dam around the attachments is also a good way to block out any overdenture attachments. Simply cut a few squares and punch a hole in the center (I usually use the smallest punch) and pull it over the attachments.
Astra Rep
7/22/2008
Dr. L - A couple of things to add: #1. You may already be doing this but make sure you're using the spacers that are included in your processing kit. They're little white rings that will slide over the top of each of the attachments and prevent the acrylic from flowing onto the attachment itself. #2, Try venting the lingual flange. From my experience, the majority of the time when a dentist is having difficulty picking up the processing caps it's because there's no room for the excess acrylic to escape. Every single time I've had a dentist vent the lingual flange they were able to pick up the caps no problem. I give all of the credit to our brilliant CDT's...I've got a great one with Astra that bails myself and my dentists out on a regular basis. Give it a shot!
JawGuy
7/22/2008
Astra Rep nailed it. Almost always it is a problem with excess material that cannot flow out. Even if it did pick up, the excess material may create problems with seating or other inaccuracies.
Bill DeWert
7/22/2008
Zest also has a kit that uses light cured clear acrylic to attach the housing. It has worked very well EVERY time for me...at least 100 housings placed. I agree with the importance of the need for a lingual vent hole and the white spacer. Have the patient place their tongue against each vent as you express the clear acrylic into the buccal access hole. They can feel when the space you've created for the housing if 'full' and overflowing into the vent. Scott (and others) at Zest have always been helpful. Call them if needed.
Robert Kreyer CDT
7/22/2008
"My protocol is to first make a complete lower denture. After the two dental implants are placed in the canine positions, my surgeon hollows out the denture over the implant sites. After the implants heal, he uncovers the implants and places transmucosal healing abutments. I then replace the healing abutments with Locator attachments." Dr.L Dear Dr. L, Another factor to consider is the protocol you described above. Here is a technique that has provided me with predictable results. Instead of finishing the complete mandibular overdenture, after the try-in duplicate the mandibular waxed denture in clear acrylic resin and make a surgical guide. To get the best results complete the wax-up after approval of try-in, make a matrix/index of the position for all anterior and posterior teeth, invest waxed denture with VPS over teeth and wax, boil-out case remove all teeth from mold and place in previous matrix/index for rewaxing to baseplate, process duplicate denture in heat cured (Ivocap preferred) clear acrylic resin, deflask, finish and polish clear denture, make a VPS soft tissue model, mark placement of implants on VPS residual ridge, drill pilot holes to receive 2.3mm diameter titanium sleeves, place guide posts in drilled sites, place 2.3mm guide sleeves over posts, hollow out area in denture to cure guide sleeves, place clear denture on VPS soft tissue model and cold cure sleeves. The surgeon will now have a duplicate surgical guide denture with titanium sleeves for correct implant placement. After second stage surgery place abutments with Locator impression copings in place, grind out the acrylic resin baseplate of initial wax try-in (denture teeth have been rewaxed to base with matrix/index), do a wash impression on baseplate and pick-up Locator impression copings in baseplate with wash impression. Take a verification bite record for remounting. Place analogs in impression copings, bead and box impression and pour in a high expansion stone, remount to opposing, invest, boil-out, place Locator titanium processing cap on analogs for technical processing or block-out around processing cap with VPS for clinical processing, process and finish for final delivery of definitive implant retained overdenture. Note: To prevent fracture around housings under load most mandibular overdentures will require a cast framework for reinforcement. A metal cap can be waxed over titanium housings (a .25 relief wax is flowed over cap before duplication). This metal vertical stop will aide in placement and the relief will allow for compression when a direct processing technique is used. Robert Kreyer CDT
Dr. Kimsey
7/23/2008
Please be aware for proper function you must use the black for fixating the female housing. Venting is useful as also is the use of the white ring or even better take the time to block out all of the space apical to the housing with the same soft light cured material often referred to as liquid dam.
Mark P. Miller, DDS
7/23/2008
All posts have been excellent. I use Locators regularly. Scott from Zest pointed out correctly that the Locator is a Zest product, not a Sterngold ERA attachment. ERA was the best for a long time. Zest came up with the Locator that now has leap-froged the ERA. Why? Good patient feel and 60,000 cycles to failure instead of ERA's 3,000. This according to sales info. Take that with a grain of salt, but I believe the information is essentially correct. When possible, use a CDT with pickup impressions. They do a better job predicatably. The doctor's question had to do with a chairside technique and that is what I can address. DO THEM ONE AT A TIME. I've done as few as one and as many as six. Here's what I do. First, make a good denture in good occlusion. That's a must. Let's assume we're picking up two at the chair. I hollow out the denture heavily in the areas of the Locator abutments. Check the holes with Fit Check to be sure it fits passively over the Locator abutments. Place the metal male over the Locator abutment. Then I add Holmes Quik-Set pink into the hole in the denture of one Locators. I UNDERFILL and use the spacer as needed. All I'm interested in doing is capturing the metal male in the denture without movement. Voids are filled in later. Quik-Set does what the name implies. It sets QUICKLY. I remove the denture from the mouth making sure the male doesn't move. Try in back in the mouth a few times and check the occlusion. Now move on to the second hole in the denture and do the same thing. If you try to capture more than one at a time and it doesn't fit, you don't know where the problem lies. One at a time solves the problem. Time is a very minor issue. Using my technique, 6 can be picked up in 30 minutes or less. 2 can be completed in 10-15 minutes. Having said all that, if you take a really fabulous impression (which should be your own personal standard of care), then your CDT can do the work for you with excellent results. A wall is built one brick at a time.
John DiPonziano, CDT, DDS
7/24/2008
To Robert Kreyer, CDT I use a Lang Denture Duplicator to make a clear acrylic (self-cure ortho resin) copy of the wax-up. From this the radiographic and surgical template can be made and the original wax up does not need to be taken apart.
Robert Kreyer CDT
7/24/2008
Dr. Diponziano, I agree there are different ways to accomplish this. My preference is to eliminate the acrylic flash that is produced during closure of Lang Duplicator which could change established VDO. With the heat cured Ivocap system I have maintained VDO, eliminated the free monomer and created a crystal clear duplicate that can be remounted. Another system to use with cold cure is the PolyMaster which eliminates the acrylic resin flash as well.
Dr.Rafael Mosery
7/27/2008
Wow, Simplicity is beauty.I can't believe how hard some of you guys are making such a simple procedure.Make sure your attachments are emerging at the proper gingival height.You want the housings to clear the gingival crest but no higher.Place the white gaskets provided by zest and place their preloaded metal housings that have the black zero retentive pickup element already in them.I prefer to use Super T it sets fast and is quite durable .I pick up both at the same time.If you're not comfortable with that do one at a time BUT LEAVE THE BLACK element in the housing you've already picked up.If the patient has an existing denture I place the implants and when I'm ready to load them I place the zest locators and housing THEN take my final impression. I finish the denture and make sure it fits passively over the attachments with the housings in place-full tissue contact and no contact or binding on the attachment/housing. I ALWAYS do the pickup chairside. If you let the lab do this for you ,you may end up with an implant supported case instead of an implant retained case.The chairside pickup will prove quite simple.As previously mentioned all you want to do is catch the housings in the denture then you could refine with acrylic after the initial pickup with the super t or whatever you choose.
King of Implants
7/30/2008
There are alot of good sugggestions. I have tried them all. In my humble opinion I feel the most accurate and stress free way of doing these cases are chairside. Use the ERA pick up (you don't need to vent the lingual) and pick up each locator individually one at a time. Try this and you will find these deliveries to be consistant and stress free. I have had the lab do it for me but I have found distortion from time to time.
Rick
8/6/2008
You should also look into the Dentatus Atlas overdenture system. With this system you will not need to remove as much acrylic and you don't need to use a hard acrylic that could get locked in. This system can is done in one stage; because of the stability of the implant combined with the resilience of the attachment material it can be immediately loaded.
Mark P. Miller, DDS
8/12/2008
Good comments all. Here's more tips. I had to revisit an overdenture of mine yesterday that was rocking loose with Locators. I couldn't replace the inserts with anything that would improve the retention. So I removed all four metal male housings from the denture. I this case in was a maxillary overdenture with two implants 25 years old and two new ones. What I discovered was that after a recent reline my occlusion was toast. I could not determine this with the male housings in place. So I adjusted the occlusion until it was extremely stable. The patient definitely felt the difference. Then I picked up the males one at a time using Homes QuikSet pink. As mentioned by many previous posts, chairside is really easy and really accurate IF you take your time and make sure each one is done right before proceeding to the next. I had a very happy patient leave my office.
Paul
9/3/2008
Having done it both ways, IMO, the easiest way is to take a good impression, use a good lab and let them do it! My lab fee is a little higher but I think I come out ahead in time and frustration. Chairside pickups never look as good as lab pickups, at least for me. If you need a good lab try Root Dental Lab (www.rootdentallab.com). I've yet to have an implant overdenture that didn't seat. As for chairside reline materials, I use imtec's which comes in a cartridge and loaded into a gun. My best advice, though, is always block out the undercuts! (Ask me how I know!) I put shims around the implants but there's many ways to do it - just do it!
mike scott
9/18/2008
this is the simple answer to the problem. after have the 'locking-on' experience i now take a PVS with the denture (keepers or MH-1 caps are already snapped on the ball abutments). send the impression to your prosthetic lab and let them finish the retro-fit for you. i've never had a fitting problem since and i've placed roughly 400 mini's and fullsize implants with ball attachments in the past 2 years. sincerely, mike scott p.s. no need for the blockout shims when you let the lab do it for you. we deliver a few hours later on the same day abutments are fitted.
MARYAM SULUKI
10/14/2008
This is my first locator case. I'm using Nobelbiocare's system. Would the above comments apply to them as well?
Rui
5/11/2011
Hi all, this was in 2008 but the topic is still recent. I have adopted the following protocol; I send impressions with transfers to my lab, they make a bite block with female locators corectly positioned. I use this bite block (with hard base)to check locator positions, if there is any proble I remove them from the hard base and re-adapt acording to above procedure (with a quick set resin). then finaly after checking adaptation I apply light silicon below denture hard base (for more acurate fit and avoid tissue compression), and send back to lab for finish. final result is usualy perfect. I only adjust when there is a problem.

Featured Products

OsteoGen Bone Grafting Plug
Combines bone graft with a collagen plug to yield the easiest and most affordable way to clinically deliver bone graft for socket preservation.
CevOss Bovine Bone Graft
Make the switch to a better xenograft! High volume of interconnected pores promotes new bone. Substantially equivalent to BioOss and NuOss.